
|
| urbanfox.tv > technology articles > camera articles > guide to buying video camera accessories |
|
ON THIS PAGE: MORE HELP AND REVIEWS |
|
|||||||||||||||||||||||||||||||||
|
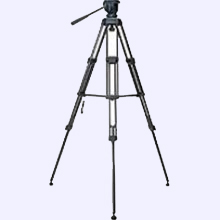
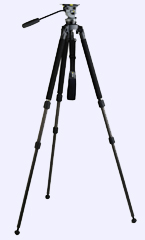
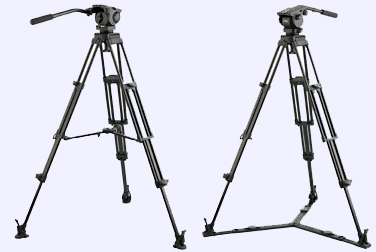
TRIPOD Buy the best tripod and pan and tilt head you can afford. Make sure it can take the combined weight of the camera, lens, battery and any other accessories you're going to use. Expect to pay between £250 - £1,000 for one suitable for lightweight cameras, or £1,000-£4,000 for heavier professional cameras. Don't expect to put your video camera on a photographic tripod and get good results - you won't. On my training courses people are always showing me some cheap tripod they bought on Ebay. Please don't waste your money on a cheap tripod. Save up and buy a good one that will outlive your current camera, will be part of your kit for a very long time and will be a good investment. The best known names in tripods are Vinten, Manfrotto, Miller and Sachtler. The things to look for in a tripod are.... Price - always a limiting factor... Weight - Not so heavy that you would get a bad back and stop using them. Not too light as to be ineffective. Remember weight gives your tripod, camera and shots stability. Most people like low weight tripods because they are easy to carry. A good meaty tripod will make you more tired at the end of the day, but your shots will be better. Carbon Fibre tripods are light weight and stable, but can be expensive. The Miller Solo (below) is a well made carbon fibre tripod that is definitely worth considering. It is expensive - but will outlast your camera.. Sturdy - Your tripod will need to be able to take a lot of abuse. Quick release hot shoe - to get the camera on and off the tripod quickly. Built in spirit level - This is esssential. The spirit level will confirm that your camera is level. Being just a few degrees out will make your pictures look wrong. Leveling bowl - works with the spirit level. It enables you to easily level the camera and your shots. Spiked feet - great for soft ground like sports pitches, gardens, even deep pile carpets. The spikes dig into the mud and keep the tripod stable. If your tripod has a low level spreader you may want to remove it so that 1) it doesn't get muddy 2) you can set the tripod legs at different lengths on very uneven ground. You can also shoot on stairwells - two legs down - one leg up - if each leg can be adjusted separately. If the ground is only a little uneven then a tripod with a "bowl" should be able to cope. Again look at the professional tripods and they will all have a tripod head that fits into a bowl shaped socket and built-in spirit level. Here are two low budget tripods and then two more expensive tripods, which are worth a look.
If you have more to spend take a look at these too.
|
||||||||||||||||||||||||||||||||||
|
BATTERIES When you buy your camera it will probably come with one small battery. This probably won't be enough to get you through a day's shooting. Always carry around with you a minimum of two batteries. Then, if possible, you could always charge one while using the other. If you buy one of the prosumer DV, HDV or AVCHD cameras you'll probably want to stick with the manufactuer's batteries, which will almost certainly be Li-ion. There are cheap generic batteries around but do check them on your camera before you buy. Batteries and cameras need to talk to each other to work out the correct amount of charge remaining - as displayed in the viewfinder display. Not all generic batteries are that sophisticated. Remember, some cameras are more power hungry than others. A Sony PD170 and HVR-Z1 can last six hours, or more, on a NP-F960 battery. But, big batteries take time to charge. Make sure your charger can cope with more than one battery at a time and, if possible, has the ability to both fast charge and trickle charge (which is more battery friendly). The main names in batteries for the larger pro cameras are PAG, Anton-Bauer, IDX and Frezzi. If you buy your charger from one manufacturer you don't necessarily have to buy all your batteries from them, many chargers now work with other batteries, but check first. The main battery technologies are Nickel-Metal Hydride (Ni-MH) and Lithium-Ion (Li-ion). We have more in depth information on the pros and cons of each type of battery on this site. For more information on batteries see: A quick guide to taking
care of your batteries |
||||||||||||||||||||||||||||||||||
|
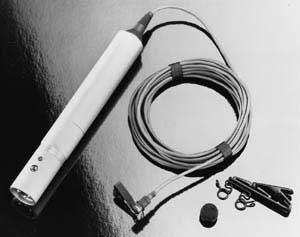
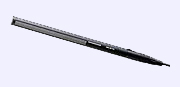
PERSONAL MICROPHONES Microphones are either designed to pick up sound from all directions (omni directional) or to be selective (cardioid and hypercardioid). If you intend to do a lot of sit down interviews buy two personal mics - one each for the interviewer and interviewee. Personal mics are also known as clip mics, lapel mics, tie mics and lavaliers (lav for short). Once placed on an interviewee they are discrete and will get you good sound because they can be placed close to the sound source. They can then be plugged directly into a camera or mixer. The most popular clip-on personal microphones are omni directional. For a good background article on personal mics try the location sound site These three below are amongst the most popular personal mics on the market. Every sound recordist will argue about which is their favourite. But, you wouldn't go wrong with any of these.
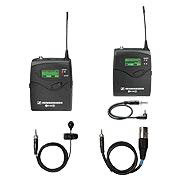
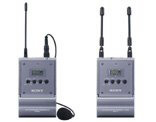
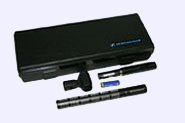
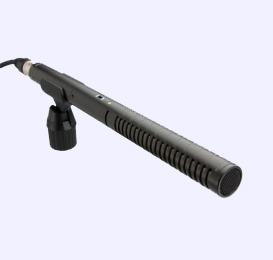
RADIO MICSSometimes cables can be a safety hazard. So, to cut the cord between you and your microphones, a radio (wireless) microphone kit is necessary. With some kits you can plug anything into the transmitter (eg microphone, mixing desk or PA system), giving you the flexibility to move around unhindered. Sennheiser makes a good range of wireless mics (the Evolution series) - while Sony's UWP range is a good budget diversity system. Check out Canford Audio's UWP-Catalogue for other systems. For information on wireless mics see our article, which includes recommendations from three professional users. Wireless microphone systems can be expensive. Buying a system that only offers a limited number of channels (usually around 8) is one way to cut costs GUN MICA gun mic (hypercardioid) is highly directional and useful for picking up your subject's voice even in noisy surroundings. Also known as a rifle mic or boom mic (because they fit on a boom pole). Traditionally, the gun mic most beloved of sound recordists has been the Sennheiser 416. It is expensive, but it will probably out-live the camera. Sennheiser's cheaper alternative is the ME66/K6 or checkout Rode. Gun mics usually need phantom powering, which can be taken from the camera or mixer. If your camera does not have phantom powering for mics make sure you buy a gun mic with a battery compartment.
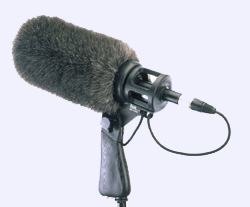
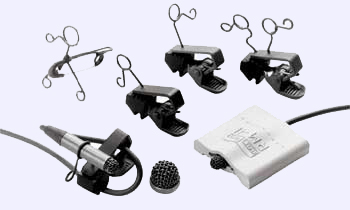
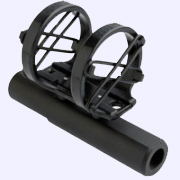
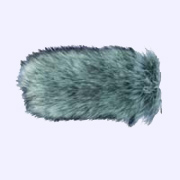
WIND JAMMERS, BASKETS AND SHOCK ABSORBERSGun mics are not hand mics. They need a shock absorber to protect them from any noises caused by rough handling. One of the simplest shock absorbers is the Beyer EA86, which can also be used to mount the mic on a mic stand or on top of the camera using the hot shoe mount. If you want to hand hold the gun mic (or attach a boom pole) then the favourite mount seems to be the Rycote pistol grip. Gun mics are very susceptible to wind noise, so they should always be supplied with a furry wind cover (foam covers are not up to the job, risk unbroadcastable sound and are a false economy). The Rycote softie with the pistol grip usually completes the kit and are very popular because they are lightwight, small and effective. If you have more money to spend then you might want to consider the full Rycote windshield basket (Zeppelin) and furry wind jammer. In the UK the wind jammer has always been affectionately called the Dougal after the dog in the Magic Roundabout.
...and of course you'll need some cables. All the mics mentioned here use professional XLR connectors. Make sure you have at least two XLR - XLR microphone cables in your kit. One about 1 metre long and another around 2 metres (which can be joined together to make a longer 3m cable). If you intend to mount the gun mic on the camera you'll need a short XLR - XLR cable about 30-50cm long. Do make sure you always have a spare mic cable in case your main one gets damaged. Once you start to make some money buy a range of cables of different lengths. |
||||||||||||||||||||||||||||||||||
|
HEADPHONES A good pair of headphones is essential. Don't buy cheap earbuds. The quality can be poor and they won't survive life on the road. Open headphones don't block out ambient sound, which can make it difficult to monitor the quality of your recorded sound. Therefore, you should use head phones with closed earpads - some sites refer to them as DJ headphones. They block out external sounds and enable you to monitor your sound quality. Make sure they are comfortable to wear because you'll be using them a lot. If you are using the Sony HVR-Z1 HDV camera you'll find the headphone output level can be a bit low - so invest in a good pair of headphones. The BBC in London uses Sennheiser HD25 headphones for its Z1 kits. |
||||||||||||||||||||||||||||||||||
|
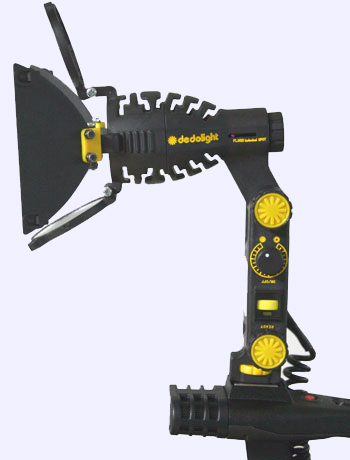
LIGHTING Light levels are measured in Lux, but Wattage is a good indicator too. Camera-mounted lights are typically 8 to 50 Watts and can be battery powered. Traditional medium sized lamps on stands have been around 600 Watts and mains powered, although the same light output can be obtained using new technology at 150W or less. Fluorescents and LED lights typically give more light per Watt than traditional lamps. Unless you buy LED lamps, which can last for years, always check the cost of replacing bulbs and their predicted life expectancy - you can easily spend a fortune on replacment bulbs. One range of lights I would recomend are the Dedolights, designed by cameraman Dedo Weigert. The bulb life is excellent and there are even stories of bulbs lasting 5 years. The Dedo may seem expensive (around £300 each), but its running costs are low. It is also very small but still has a big light output. The two aspheric lenses in the housing ensure that the 150Watt lights give an equivalent 300 Watt output. Watch the video below to see why they are so good compared to the cheaper competition.
Before you buy any lights, I would recommend you attend a good quality lighting course which should include;
Then ask the instructor what lights they would recommend for the type of shoots you work on.
Lights are tools and you need a different tool to do different things. You don't own four identical kitchen knives do you? No, you have a carving knife, bread knife, vegetable peeler and table knives. So, please don't make the mistake of buying a lighing kit made up of three or four identical lamps in a specially designed bag. It will look good but will not be practical.
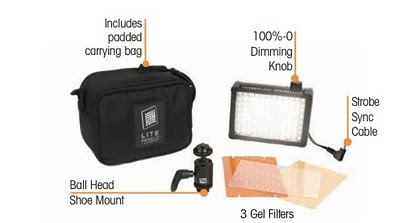
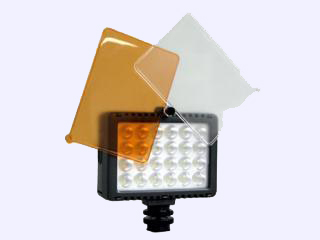
Lights come in two flavours: hard and soft. Hard lights rely on a point source of light and give distinct shadows for modelling your subject. They usually come with barn doors to restrict the spread of light. Soft lights are very broad sources of light giving a more even, gentle illumination. Soft sources may be a hard light with a soft box (eg a chimera) or it may be a dedicated soft light using fluorescent tubes. Your lighting kit should have a mixture of hard and soft lights. Lights also come in two colours. Daylight at the blue end of the spectrum (5,600 Kelvin) and Tungsten light (3,200 K) is at the red/orange end of the spectrum. Both can be used with colour correction gel to convert them from daylight to tungsten and vice versa. Keep an eye out for the very efficient LED lights. Currently, you will mainly find these used as on-camera lights (see below), but they are now being used more and more in all kinds of lights. In the picture you can see on of my dedo lights on a Manfrotto Magic arm attached to a shelf with a superclamp. ON CAMERA LIGHTSCamera mounted lights were notorious for using lots of battery power, but most on-camera lights are now LED which are much more energy efficient. They can also be dimmed (without changing colour temperature) and the bulbs last a very long time. Here are some to check out. They all fit on the camera's hot shoe. However the Rotolight can also fit snuggly around a camera's on-board microphone.
FILTERSNow we've all gone digital and can edit on computers there are very few filters that can't be replicated in the edit suite. So, there are very few filters that you really need. For an excellent guide to filters see Ira Tiffen's introduction to camera filters. Here are the top four filters that I think you should consider buying because no software is able to do what they do - yet.
Some filters just screw into the front of your lens. Others will need a holder to correctly position them. Cokin does a filter holder for its range of filters - these are relatively cheap. The alternative is a matte box. It does make you look like a serious shooter, but is only essential when you really get into filters. Specialised filters can be screwed directly onto the front element of the camera lens. However, if the front element moves when you focus (i.e. the lens does not have internal focusing), then you'll need a Matte box to make best use of some filters.
|
||||||||||||||||||||||||||||||||||
|
WATERPROOF Cameras are NOT waterproof - they really must have some protection from the rain. There are a wide variety of rain covers for cameras. Make sure that you get one that is designed for your camera model. Again, try it out. Is it quick and simple to attach? Once it is on, is it easy to access all the camera controls? If you are working by water or going out in a boat then take a look at Ewa-marine. It manufactures underwater housings to protect the camera - even if you don't intend to go underwater! If you want to make sure the rest of your gear stays dry (especially batteries and tapes) check out the bags at Seal Line. Its bags and cases are used by canoeists to protect their kit. Also check out Peli Case. Its cases may seem a bit expensive, but if your kit is washed overboard it will float and keep everything inside dry and safe. |
||||||||||||||||||||||||||||||||||
|
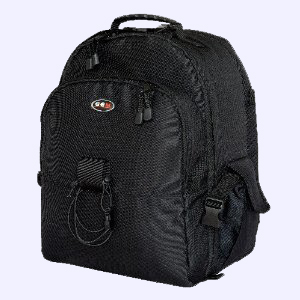
For bags and cases to protect your precious kit, check out the likes of Camrade, CP Cases, Kata, Luggy, Petrol, and Peli Products. For smaller amounts of kit, a backpack may be enough (make sure it is well padded). If you are on a very tight budget the best value camera bag I've found is the GEM SLR camera backpack with laptop compartment (pictured) from www.amazon.co.uk for £34.96. Great value and it seems very well made for the price. The same reseller also has a smaller version without the laptop compartment for only £26.96. Larger cameras, lights, etc., will obviously need bigger, stronger bags, and it is useful (for your back's sake) to get a bag with wheels. If you intend taking your camera on an aircraft, make sure you get a bag that fits the carry-on luggage requirements, as you don't want your camera to go through as checked baggage if you can avoid it. |
||||||||||||||||||||||||||||||||||
|
This page has undergone lots of changes since I first wrote it for Content Creation Europe (No 7 - published Sept/Oct 2000 ), and again for Broadcast magazine in September 2004, and did another version for the IBC Daily News for September 2005. I've tried to put together the essentials you'll need, plus, mentioned all the popular makes and models. I've probably used 95% of the kit mentioned here and at least know someone else who has. So, I feel comfortable recommending it. But don't take my word for it. Read other reviews and then, most importantly of all, test drive it to make sure it is right for you. |
||||||||||||||||||||||||||||||||||
| More...
MORE HELP AND REVIEWS ON THIS SITE: Buying an HDV or DVCPRO HD camera Guide to buying a DV or DVCAM camera
|
||||||||||||||||||||||||||||||||||
|
|
||||||||||||||||||||||||||||||||||
 Buying accessories for your camera kit.
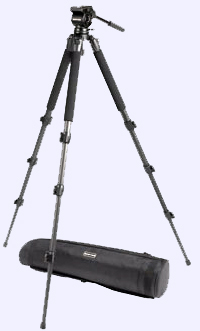
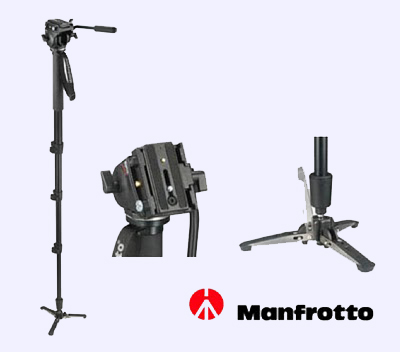 If you want to be more moveable but still get stable shots I highly recommend a monopod. The Manfrotto MN560 B (£100) and the 561B have three tiny feet for extra stability. They will get you high and low shots and not take up much space. I use mine for photos and videos.
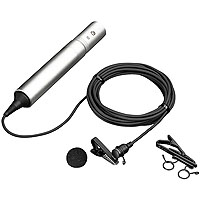


 A good kit will have a mixture of lights for different jobs. Hard and
soft / large and small.
A good kit will have a mixture of lights for different jobs. Hard and
soft / large and small.

 BAGGAGE